on
Particle Bullets
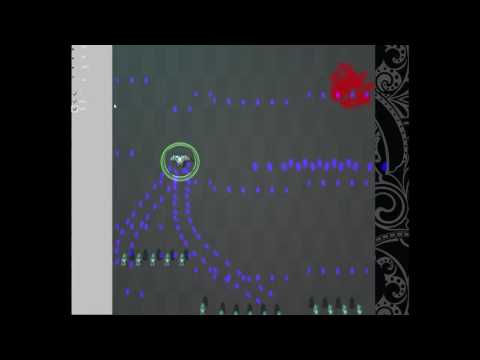
Particle Bullets is a projectile system created for Unity that uses the Unity particle system. The idea came about when creating SHMUP games for Unity; I wanted an efficient way to create bullets for bullet hell style games. I realized I could use the particle system as a black box and get all the desired functionality I wanted in a highly efficient manner. Collision, pooling, grouping, and rendering is all handled by the Unity particle system. Below are some videos and WebGL Demos. The second demo is meant to be played on a dual stick controller, but I have added keyboard shortcuts to the demo so that one can see the functionality if lacking a gamepad. It uses "wasd" for movement (left joystick), "okl;" for gun firing direction (right joystick), and ",." (bumpers) for weapon switching. Gamepad testing was done exclusively with an Xbox 360 controller, but I tried to map to the most common buttons on all gamepads. There is also a video where I go over the second demo if one would prefer to watch or does not have the ability to play the demo.
UPDATE: Demos are no longer functioning due to age of Unity Builds.
Particle Bullets 1.1 Features (WebGL Demo 2 Video: Example levels) Video Link:
Some videos recorded during development -
Video Link:
Video Link:
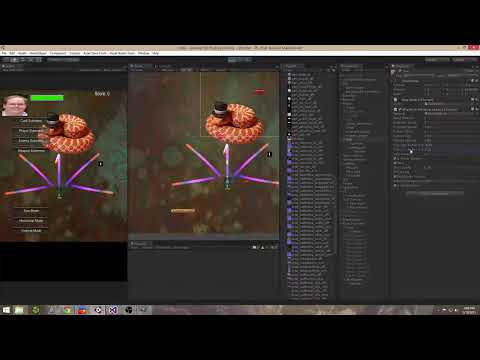
I wanted the system to be very easy to use. To create a weapon, one copies a weapon prefab to any game object in the scene. The forward direction of the weapon is along the z-axis, so one orients the z axis arrow and now that weapon will shoot from where it is attached. There are many packaged prefabs which can be seen in the "Example weapons" WebGL scene. The user also has the ability to create their own weapons in Unity by modifying any of the parameters of a weapon.
Weapon Options -
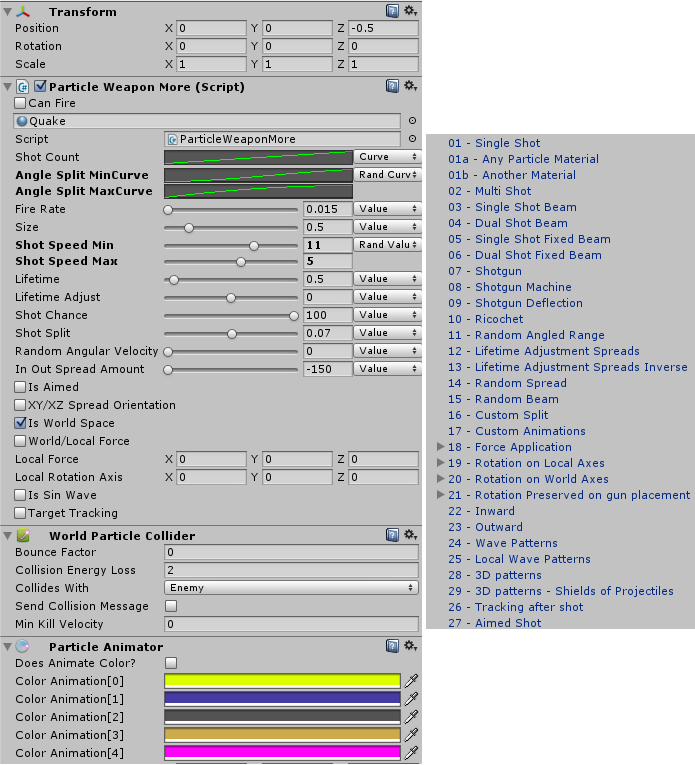
There are two main scripts for a weapon: ParticleWeapon and ParticleWeaponMore. The ParticleWeaponMore script overrides the per particle update function of each projectile. "Is Sin Wave" and "Target Tracking" are the only included options that use the ParticleWeaponMore script. Because of the per particle updates, it is only recommended to use ParitcleWeaponMore if you want these features; all other features in the above image can be used with the ParticleWeapon script.
Most options have a selectable input drop-down that can be set by Curve, Value, Random Value, and Random Curves. Value uses a single number that is entered via Textbox. Curve will take input from a MinMaxCurve (Unity class), which will change value over time based on the input curve given. Random Value will be a value between the two given inputs, and Random Curve will take 2 MinMaxCurves as input and use a random value between the two curves. We can get very complex values for all parameters of a weapon with these settings. I'll go over each of the options and give a brief description of each.
Material            - Unity material to use as the visual for projectile (Quake material in image)
Shot Count          - Number of projectiles fired per shot
Angle Split         - Split only option, angle difference between each projectile
Fire Rate           - Rate of fire limiter
Shot Speed          - Projectile speed
Lifetime            - Projectile duration
Lifetime Adjust     - Split only option, add/subtract lifetime from outermost to innermost projectiles
Shot Chance         - Percentage based chance to shoot individual projectiles
Shot Split          - The horizontal distance between projectiles
Random Angular Vel  - Projectile spin
InOut Spread        - Curvature to splits
Is Aimed            - Shoot towards target transform.  When selected, target transform option appears
XY/XZ Spread        - Orientation in which the spread expands
Is World Space      - World or Local space
Local Force         - Apply force over time
Local Rotation Axis - Apply rotation over time
Is Sin Wave         - Per particle effect for sin wave particle stream
Target Tracking     - Per particle effect moving bullet towards target each frame
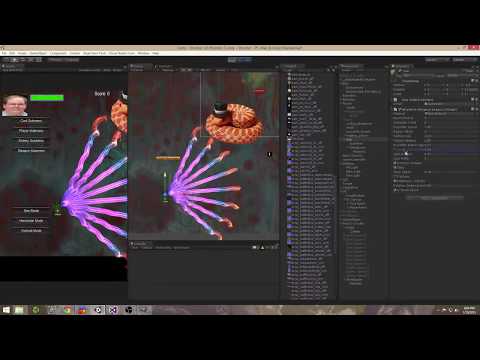
Some options need more explanation. When firing multiple particles, we need a split distance and angle, otherwise the particles will just overlap. Setting distance only will result in a bar-like shot pattern that is spread out evenly by the distance provided. Setting angle only will give a triangular spread, and setting both gives the combination. Lifetime Adjust modifies the lifetime of a split from outside-most particle to inside-most. This gives the resulting split pattern a V or inverse V shape. Shot Chance was added to give variety to each shot when we have higher shot counts. Random Beam and Shotgun in the "Example weapons" demo are examples of weapons that use this option. Apply rotation over time will bend and twist the plane on which the particles lie, allowing for some interesting patterns, especially when used in Local Space. XY/XZ Spread option is needed because one can create a project in multiple orientations. The spread will grow along either the XY or the XZ axis depending on this toggle. These two options were enough for all the use cases I had, but one could extend this option to spread along an arbitrary axis. The particle animator can be used to animate color over the projectiles lifetime, and the World Particle Collider gives the ability to ricochet shots on impact, as well as choose which objects to collide with based on Unity's collider bit mask. I tried my best to cover all these options in the example weapons scene, which can be seen in the "Example weapons" WebGL Demo.
UPDATE: Demos are no longer functioning due to age of Unity builds and have been removed from this section.
I find that examples are a great way to learn and understand a system, so for an update to the initial release, I worked on an "Example levels" scene (link underneath paragraph or at top of page). In this scene there is a mocked up UI that tracks ammo, health, score, and shield health. A pickup system has been implemented that uses this UI. A player object with weapon selection and movement has been created along with multiple level types: vertical/horizontal scroll and top-down camera follow/fixed. A boss with multiple weapons and phases based on its HP is also demonstrated. There is also a shield object that absorbs bullets and a few different enemy types. All these features can be combined to create SHMUP games that can be extended easily.
UPDATE: Demos are no longer functioning due to age of Unity builds and have been removed from this section.