on
Chess Overlay
Chess Overlay is a project I wrote to learn a little bit of everything. Originally it was to learn an image processing library called AForge and to improve my C# composition. It uses win32 API calls for the following: mouse and keyboard hooks to consume input globally, managing processes, capturing screen image data, acquiring window position data.
Before Select-
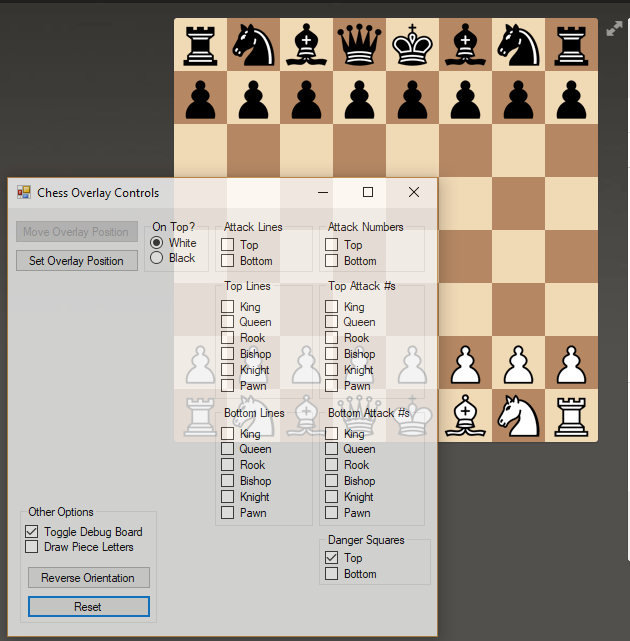
When the program is first started, a semi-transparent form is loaded. One must drag and adjust the inner frame of the options window to match the size of the chess board and then click "Set Overlay Position".
After Select-
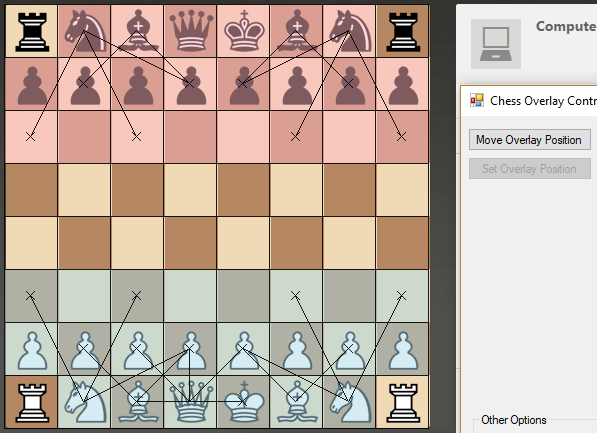
In this image the danger zones and some attack lines options were set, but one can ignore those for now. After "Set Overlay Position" has been clicked, an overlay will appear on top of the chessboard, and the transparency will be removed from the options menu. Grid lines will appear so one can tell if the application is aligned properly. If the grid is not properly aligned or pieces are not recognized correctly by image recognition, one can use the "Move Overlay Position" button to reset the grid and align the inner window again. The grid lines, highlights, letters, and attack lines are drawn to a graphics buffer. The buffer is then swapped with the windows form graphics (double buffering to prevent flickering). The graphics are drawn to a fully transparent bitmap to get a nice overlay effect. This overlay form is positioned and sized when one clicks the "Set Overlay Position" button. The control menu is always on top so that options can be toggled while playing one's match.
Options and Internal Representation-
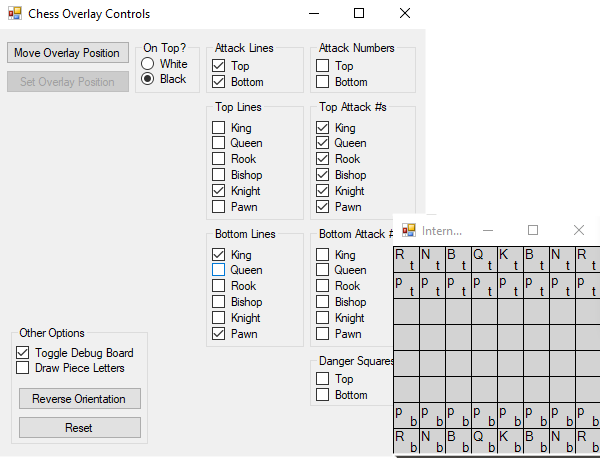
There is an internal state representation window that can be toggled on/off if one needs to verify the integrity of game state. The "On Top?" option is needed because the image recognition does not know which piece is King/Queen, and depending on whom is on top, these pieces get swapped. With slight modification, one could more easily update board state from the move list, however, this project was started with the purpose of learning the AForge imaging library. In the bottom left, there are some more options to toggle the board state window, draw piece letters to overlay, reset (which clears graphics and board state), and a reverse orientation button which is needed if one changes orientation in the chess application.
When the overlay position is set, a screen region corresponding to the inner frame of our option window is captured and divided into an 8x8 grid. The initial state of a chess board is known, with the exception of the king and queen, so these images from the initial state are used to ascertain what each piece looks like. This gives us a general way to match any style of piece that is used. This was not a fool-proof scheme, but it worked on many chessboards that were tested. When a piece is later moved, it is compared to the saved initial piece images. This is the reason there is an option to set which color is on top; we have to differentiate the King and Queen.
Attack Lines-
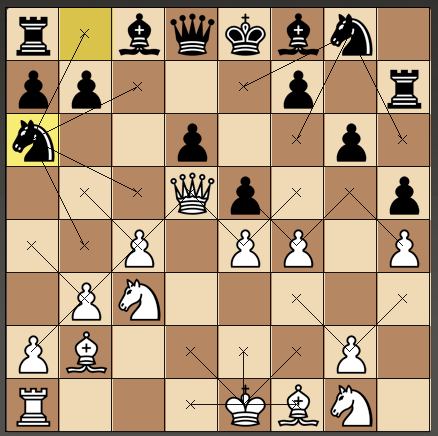
Attack lines are drawn for the selected sides and selected pieces. In the image above, black has only knights selected, and white has pawns and king selected.
Attack Numbers-
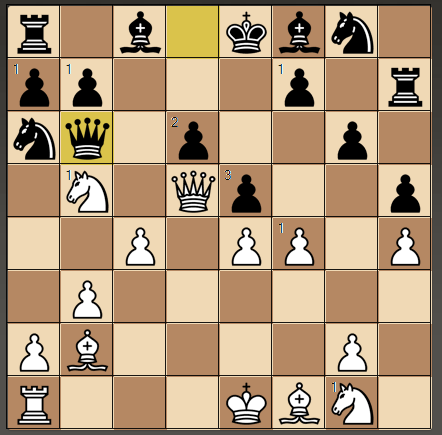
Attack numbers show how many enemy pieces are attacking each piece, again, with the ability to toggle by piece and side.
Danger Zones-
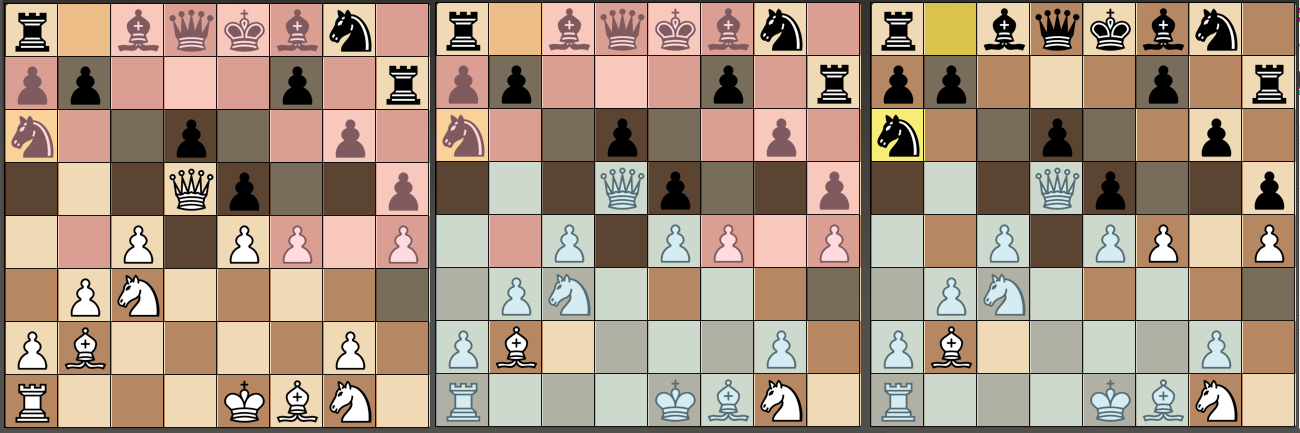
Danger zones show any square under attack by top (red) or bottom (blue) and can be toggled for either player. The greyed squares are under attack by both top and bottom. This is a great tool for quickly analysing a board in order to avoid making blunders. Attack lines have similar effect, but when all attack lines are enabled, it can get cluttered. Mixing danger zones with attack lines on knights and bishops were my most common use case.
Markers-
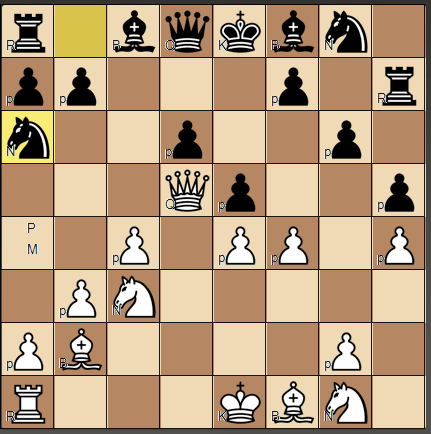
If one looks at a4 (middle left), one can see a 'P' and 'M'. The hotkey 'P' is used to mark pins and 'M' is used to mark candidate moves (or whatever else one would like to manually mark). To add markers, move the mouse over the desired piece/square and press 'P' or 'M'. Global mouse and keyboard hooks were used to capture input so there is no need to get focus on the Chess Overlay application.